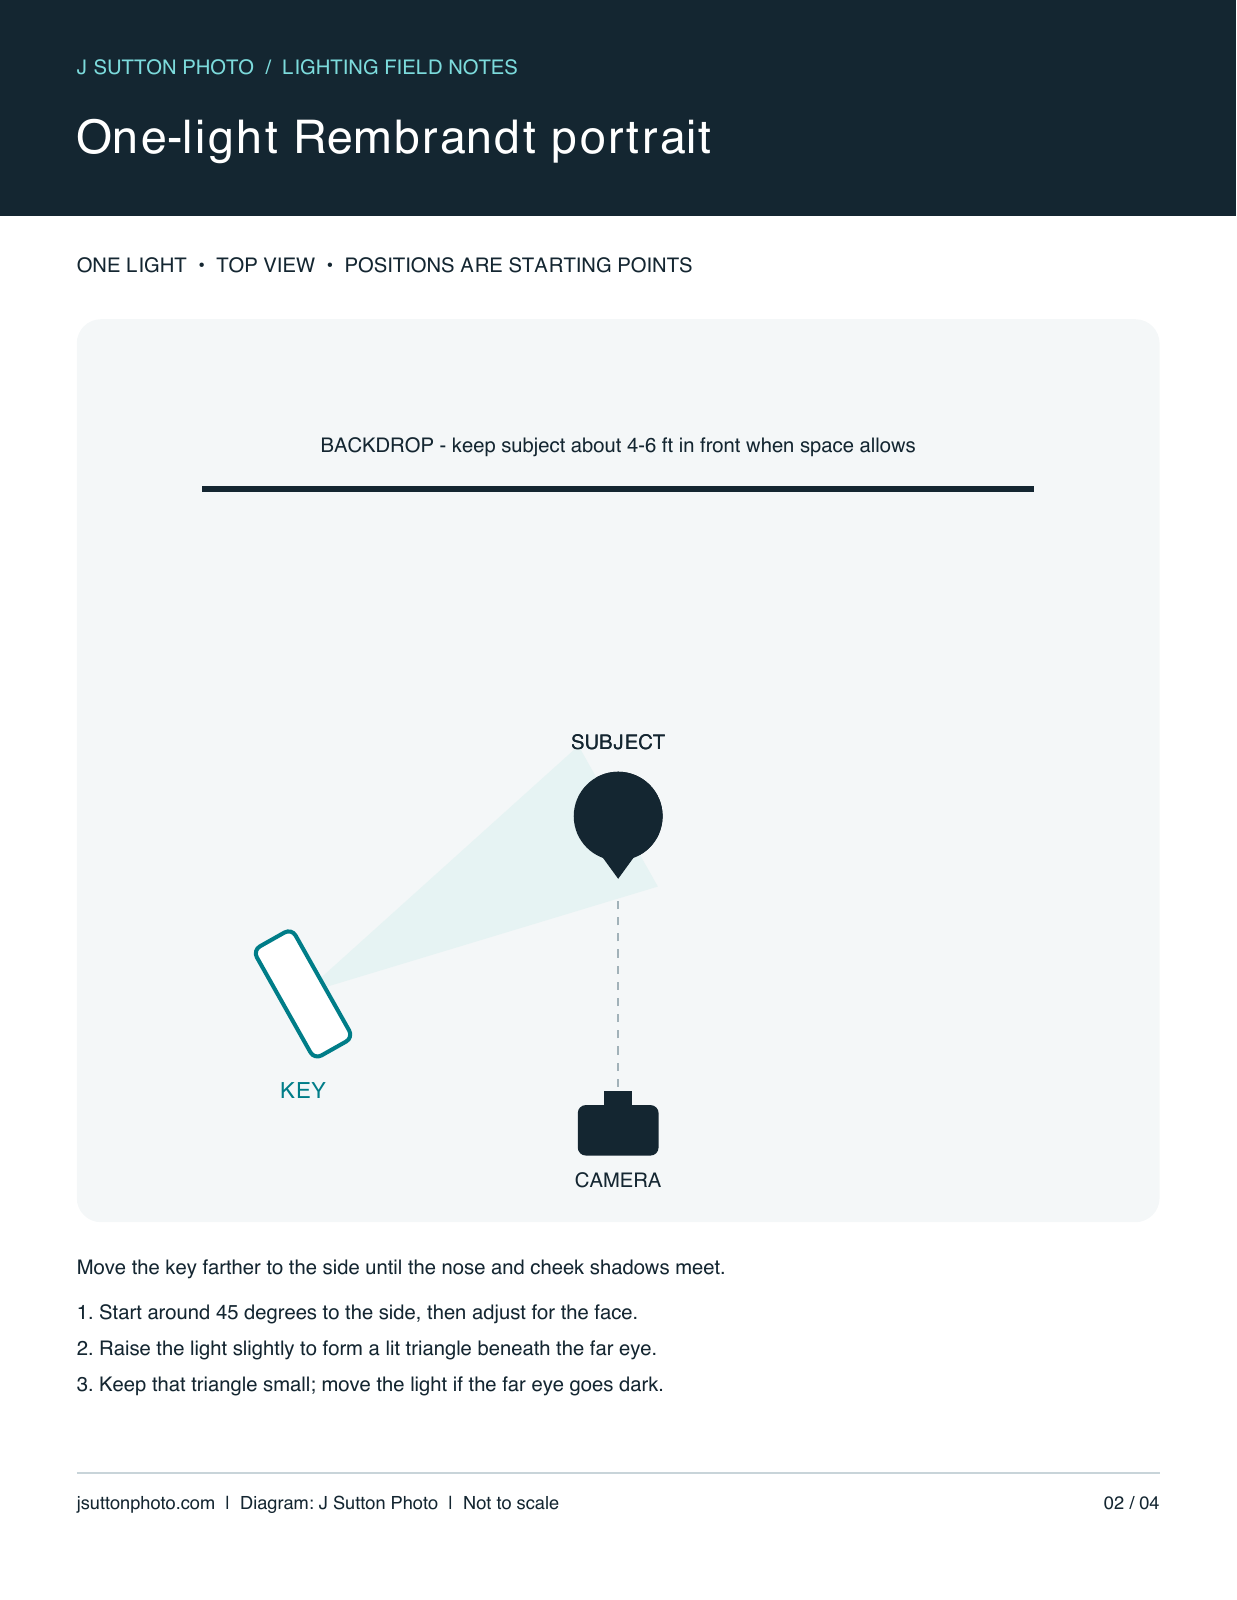
Rembrandt lighting creates a small triangle of light beneath the eye on the shadow side of a face. You can make it with one light by moving the key farther to the side and slightly above eye level until the nose shadow connects to the cheek shadow. The pattern comes from light placement and the subject’s face, not from a particular brand of modifier.
In lesson two of the J Sutton Photo lighting series, the equipment stays simple. The change is deliberate shadow placement. If you are new to off-camera flash, begin with the one-light loop lighting lesson.
Download the lighting diagram

Download the printable lighting diagram (PDF) · Download the diagram image (PNG)
Portrait reference: what to look for

What changes from loop lighting?
In loop lighting, the small nose shadow stays separate from the cheek shadow. In Rembrandt lighting, those shadows meet and leave a lit triangle below the far eye. That connection gives the face more contrast and can suit editorial portraits, artist portraits, and a more reflective mood.
Rembrandt lighting does not require a black background or a severely underexposed face. You can use a soft source and retain detail in the shadows. The defining feature is the pattern.
Build a one-light Rembrandt setup
- Start with the loop setup. Use one softbox to camera-left, above the eyes, and a subject positioned away from the background.
- Move the light sideways. Start around 45 degrees from the camera axis and work farther around as needed. Watch the face rather than relying on a fixed number.
- Adjust height. Raise the source gradually so the nose shadow angles down toward the cheek. Aim the modifier toward the face.
- Refine the triangle. Ask for a small head turn toward or away from the key. Stop when a small patch of light appears beneath the far eye and the eye remains readable.
- Reset exposure if necessary. A change in distance or angle may change brightness. Check highlights and the histogram after each meaningful move.
For flash, use manual exposure and a shutter speed within your camera’s normal sync limit. Choose aperture for the depth of field you need, then adjust light output. Keep your camera settings fixed while studying the pattern so exposure changes do not hide what the light position is doing.
Troubleshooting the triangle
There is no triangle: move the key a little farther sideways, or turn the subject slightly away from it. The far eye is buried: lower the light or bring it a little toward the camera. The triangle is too broad: make a small change in light angle or head position. Different faces need different placements.
For glasses, watch reflections while moving the source upward and sideways in small increments. Keep the subject’s chin and posture natural. Solving a reflection by forcing an uncomfortable head tilt rarely makes a better portrait.
Control the mood without adding another light
A nearby white wall can brighten the shadow side and reduce drama. Moving farther from that wall, or placing a black flag on the shadow side, reduces reflected light. This is negative fill: the flag removes bounce rather than creating illumination. Keep the flag out of frame and secure it safely.
To soften the transition, bring a larger modifier closer and readjust output. To change the background, alter spill, background distance, or background tone. These controls let you separate softness, contrast, and background brightness instead of treating them as one setting.
Practice: photograph the transition
Keep the subject in place and make a sequence from loop to Rembrandt to split lighting. In split lighting, roughly half the face is in shadow. Compare the connecting nose shadow and the far-eye detail. The exercise makes the differences visible without adding equipment.
Do I need a reflector?
No. Learn the one-light pattern first. Add a reflector only if you want more shadow detail; it may reduce the contrast you chose Rembrandt lighting to create.
See J Sutton Photo portrait photography for creative and professional portrait options in the San Diego area.